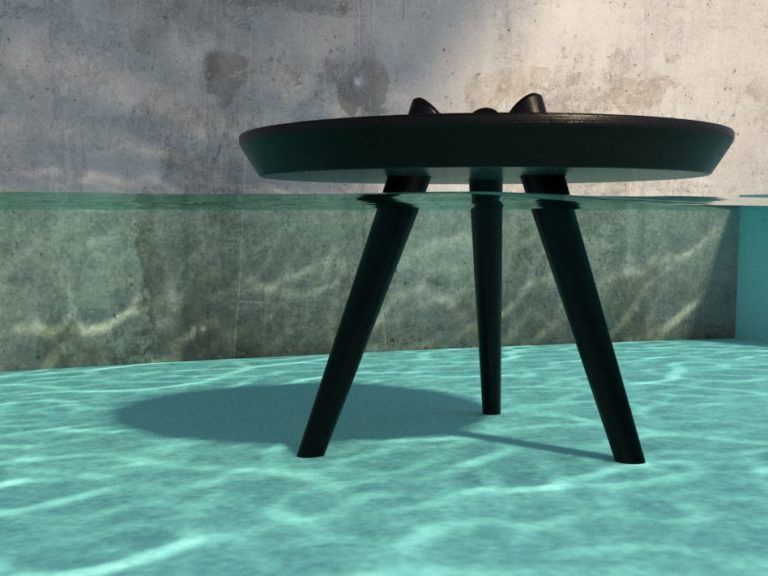
VRAY CAUSTICS
If you had a hard time figuring out how to set up VRAY CAUSTICS – Then you should check this Easy step-by-step guide for mastering your water caustic reflections with 3DsMax and VRAY NEXT.
Here you have a sample scene to download so you could follow along. I encourage you to create your own rig, simply because it’s fun to work and test caustics!
The minute you’ll get a hand of that, your water will never look boring!
Alright so let’s get started
LEARN VRAY NEXT CAUSTICS LIKE A PRO!
Steps for setting up VRay caustics:
1. 3D Model – very important to have enough geometry while working with your water, in the next tutorials we will discover more advanced ways for simulating water. For basic swim pool water simulation, we can use plane object with a lot of segments.
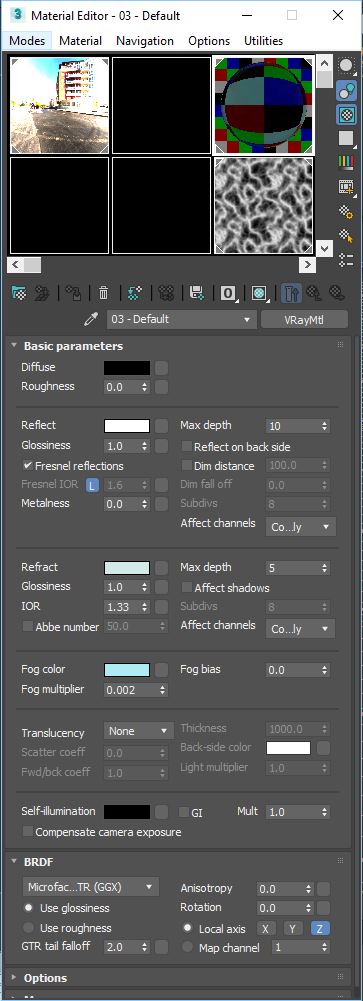
2. Water Material – IOR 1.33 and turn off Affect Shadows
*You can play around with the color of Refraction to make the water look denser.
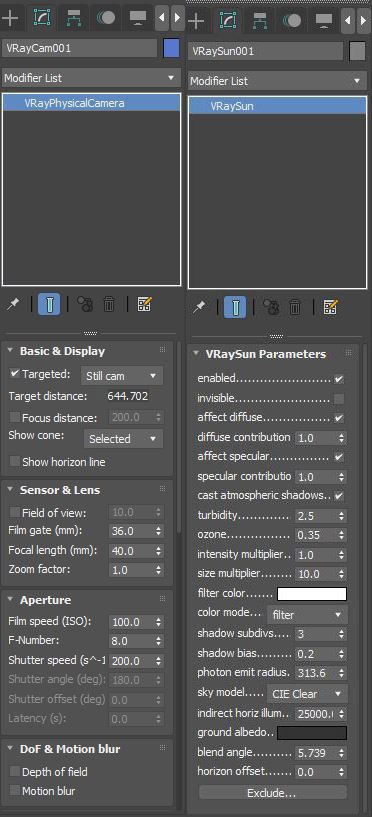
3. Add VRaySun (with VRaySky) – Make sure that Photon emit radius is covering the water. Add also VRayPhysCam – I’ve used default settings.
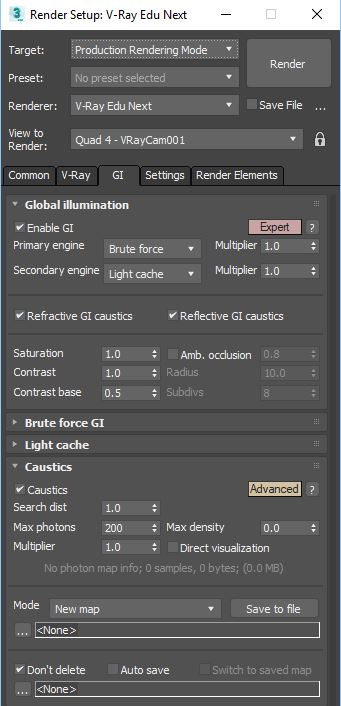
4. Activate Caustics and set the Search dist =1 in order to get denser spread. Increase Max photons =200 that should be enough to get nice shapes of caustic reflections.
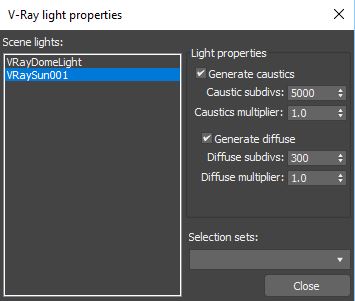
5. Now we need to add some quality by increasing Caustic subdivs=5000
*Right Click on the VRaySun->VRay Properties
Now your caustics got good quality and ready to show some nice detail.
Hope you were able to enjoy and get quick results!
Next, we gonna have some fun with real water simulation plugin – Phoenix FD
Thanks for stepping by – Share it & Keep following!
Cheers
If you like this stuff and you want to learn more? Join our VRay Rendering class here


